Mustang Cobra Fuel Tank Swap Instructions
· Tools Needed…
· Jack & stands
· 3/8″ Ratchet & Extensions
· Metric Sockets (8mm, 10mm, 13mm)
· Flat and Phillips headed screwdrivers
· Soft faced hammer
· Fuel line disconnect tool *Special Tool Required*
Before You Begin…
I did this alone, but I would highly recommend someone to assist. It would make the job go faster and much easier. I ran the tank down until the fuel light came on and the tank was very easy to drop…not heavy at all. If all you purchase is the pump and tank listed above, you will be set. No other parts are needed unless you break something. You will re-use some original parts that I’ll list below.
Install Outline…
1. If you’re one who actually does this, disconnect the negative cable from the battery. You’re dealing with fuel and some electrical connections for the pump, why take the risk? I never did this before until I almost set my truck and garage on fire one day installing a set of long tube headers. I was setting the driver’s side header into place when it slipped out of my hands and landed on the starter and started to arc weld to the engine block. I completely melted the wiring harness going into the starter and got some bad electrical burns on my hands. Learn from my mistake…now I always disconnect the battery no matter what I’m doing to any of my vehicles. Pop the hood and locate the relay box on the driver’s side. Remove Fuse 14 (fuel pump). I just cranked the car until it wouldn’t start and removed some residual fuel from the lines. Not sure if this is correct procedure or not, but I did it and barely had any fuel come out of the line when I disconnected it from the pump.
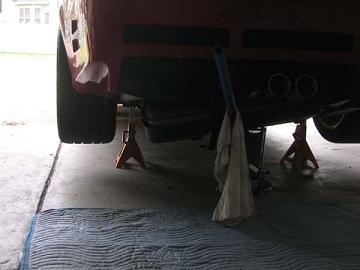 |
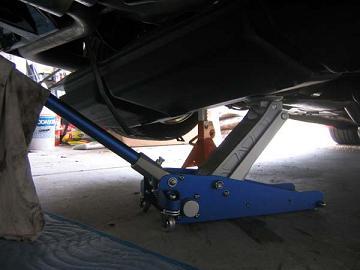
2. My car up on jackstands… |
|
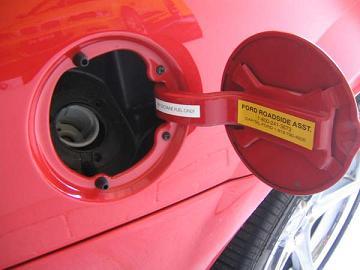
3. After you have the car secured on jackstands, disconnect the fuel filler neck from the body by removing the (3) 10mm bolts. The gas cap is secured by the lower bolt, remove it and set it aside as well… |
|
4. Pop open the trunk and remove the carpet and panel from the inside passenger side. Behind this is a rubber gromet in the trunk for the filler neck and vent hoses. There are three 8mm bolts to remove. In hindsight, this may not really be necessary as just removing the bolts listed in Step 2 should be sufficient. Figured I would just mention this if it became an issue… |
|
5. Place a jack up against the center of the gas tank to support it as you remove the two bolts on the forward end of the gas tank that secure the straps. The bolts are 13mm in size. I removed the bolt on the after, passenger side as well and just completely removed the passenger side strap. The after end of the driver’s side strap is a hinged connection. Straps removed… |
|
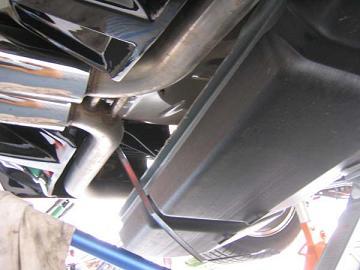
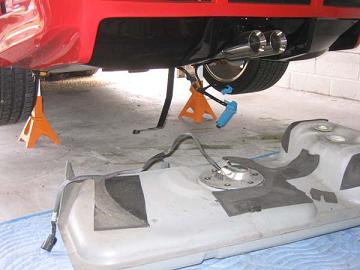
6. You’ll want to slowly lower the tank with the jack and be sure to balance it on the way down. My Saleen has a center-exit exhaust and it was necessary for me to maneuver the tank around the exhaust pipes. Do not lower it all the way…just about half way down. You’ll now want to remove the fuel hoses from three metal clips located on the left (one clip) and forward edge (two clips towards the right side) of the fuel tank. If the clips come off easily, take them off as well since you’ll be re-using them on the new Cobra tank. Otherwise, just wait until the tank is completely out and remove them. Also, disconnect the electrical connector leading to the large blue vent canister. There is another connection towards the rear bumper. Dropping original tank… |
|
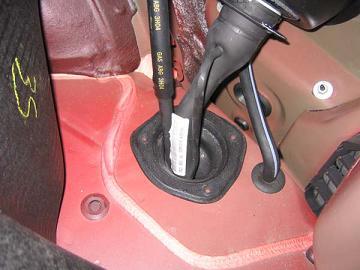
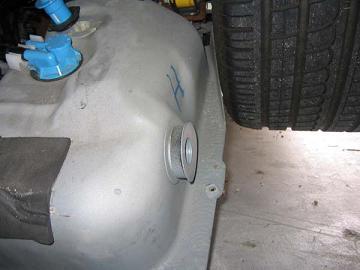
7. Just continue to lower the tank and make sure no stress is being placed on any of the lines. Once lowered, use the fuel line disconnect tool to disconnect the fuel line leading into the fuel pump. A little bit of fuel came out, so have a shop rag handy. On the right side of the tank is the filler tube and opening. There is a screw securing a metal fitting to the tank. Remove the screw and let the fitting hang. Pull the filler tube out, it is in there quite a ways. It may take some effort to get it out. Filler opening on stock tank… |
|
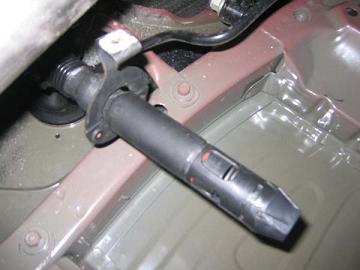
8. This is the filler tube once removed. Don’t worry about removing any rubber gromets or gaskets from the stock tank, the new Cobra tank has new ones. |
|
9. The hardest part of this entire install is removal of the two blue vent canisters. I can’t give you any more advice than to be patient and use a lot of force without breaking the canisters as I’ve heard they are very pricey to replace. I did break the lip of the larger canister, but did not break the canister itself. My method…just worked it by rotating clockwise/counterclockwise (back and forth) and pulled up. Definitely use a pair of Mechanix Gloves. I used a flat blade screwdriver to help pry up on the lip, but make sure you do this where there is plenty of plastic webbing and don’t use too much force. Stock tank dropped… |
|
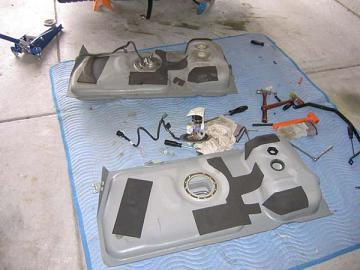
10. Once all lines and canisters are free from the original tank, pull it out from underneath the car. Take the tank out of the black plastic skid plate/protector and swap that over to the new tank. New Cobra tank in foreground… |
|
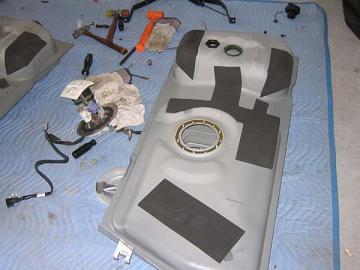
11. Take the Cobra pump and install it into the Cobra tank. When doing this, make sure you DO NOT BEND the float. The problem I’ve heard a lot after this swap is the fuel level gauge being off. Sometimes when Ford ships the pump, they’ll bend the float in the box/packaging. I don’t have a problem and my gauge reads fine. Just install the pump so the fuel line faces forward. There is an arrow on the top edge of the pump that will point in approximately the 2 o’clock position. Just reference the stock pump, they look similar on the outside. The pump just drops in and bolts up. Prepping Cobra tank for install… |
|
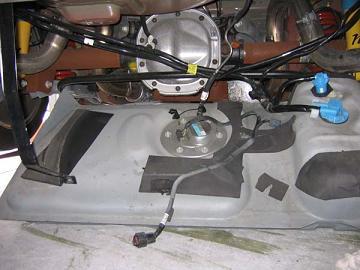
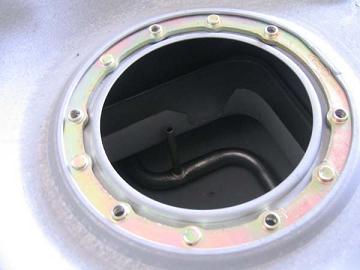
12. Just a pic inside the new Cobra tank (notice the baffling that surrounds the pump)… |
|
13. Place the prepped tank under the car and get it on the jack and raise it up just enough for the fittings and electrical connections to reach. Install the two blue vent canisters first, then insert the filler tube on the right side. Connect the fuel line to the pump and the two electrical connections (direct fit). Ready to install new tank… |
14. Raise the tank up and watch that you don’t pinch any lines. Place the lines into the metal clips/hooks and bolt up the straps. I would next bolt the three 10mm bolts for the filler tube. With one hand inside the trunk, maneuver the filler tube so the holes line up. Then, replace everything in the trunk. Fill the tank back up with some gas, replace the pulled fuse and negative battery cable, and check the fuel level gauge. Also, check for any leaks under the car.
Ending Notes…
A good mod if you also road race and autocross. If you’re just looking for a fuel pump to support higher hp levels, then a Focus pump is all you really need. I intend to do a lot of work to my car and wanted this to support big numbers down the road. Hope this helps others as I had limited info about the swap.
You’re all set… |
